Posts

Showing posts with the label Article

3D Effect Crochet Hotpad for Beginners

Image
The hotpad is just one row pattern but thanks  to 3d effect and color combination possibilities, you can create various designs. We will start with a ring hanger. You can crochet all around it and have different number of stitches then you must devide that number into two. Use just one half of stitches for creating the square. I have in total 20 stitches so I will work only in 10 stitches. My first row will be 4 single crochet, inc×2, 4 single crochet ( 10 stitches). My second row will be 5 single crochet, inc×2, 5 single crochet and etc. Just keep making two increases in the center. You can make any size. Watch the video to see how to give it a finished look. Thank you! HERE THE VIDEO TUTORIAL:

How to crochet Worry Worms in 5 minutes for absolute beginners

Image
Written Pattern Start by making slip knot and chain as long as you wish. I recommend 25 and more chains. Row1: chain 2 and make 4 single crochet into each chain. Into the last chain make 10 double chrochet, slip knot, chain1 and cut the yarn. Attach the eyes. 🐛 In this beginner-friendly crochet tutorial, you'll learn how to create an irresistibly cute worm in just five minutes! Grab your crochet hook, yarn, and a pair of eyes to get started on this fun project. 🧶 This step-by-step tutorial covers all the basics you need to know, including single crochet, double crochet, chaining, and slip stitching. Even if you're new to crochet, you'll be able to follow along and create your own worm in no time. ➰ Customize your worm with different colors to make it even more vibrant and eye-catching. Whether you want to use it as a toy or a cute keychain, the possibilities are endless. 👀 Don't forget to add a pair of eyes to give your

Learn to Crochet Popcorn Stitch: Add Texture and Volume to Your Projects

Image
If you're looking to add texture and volume to your crochet projects, popcorn stitch is a great technique to learn. This stitch is created by working multiple double crochets into the same stitch and then pulling through all the loops to create a "popcorn" effect. In this tutorial, we'll show you two different ways to make popcorn stitch and how to use it to add interest to your crochet projects. What is Popcorn Stitch? Popcorn stitch is a decorative stitch that can be used to add texture and volume to your crochet projects. It's made by working multiple double crochets into the same stitch and then pulling through all the loops to create a raised "popcorn" effect. Popcorn stitch is often used in blankets, scarves, and hats, but it can be used in any project where you want to add a bit of texture and interest. Materials Needed To crochet popcorn stitch, you'll need the following materials: Worsted weight yarn in the color of your choice Crochet hook

How to Crochet a Net Bag with Solomon's Knots: A Perfect Project for Beginners

Image
If you're new to crochet and looking for a fun and easy project to try, a net bag with Solomon's knots might be just the thing. Not only is it a great way to practice your crochet skills, but it's also a sustainable alternative to plastic bags. In this tutorial, we'll show you step-by-step how to crochet a net bag with Solomon's knots. What are Solomon's Knots? Before we get started, let's talk a bit about Solomon's knots. Also known as the lover's knot, Solomon's knot is a crochet stitch that creates a lacy, openwork pattern. It's made by creating a series of loops and then joining them together with single crochets. Solomon's knots are often used in crochet lace and shawls, but they can also be used to create bags and other accessories. Materials Needed To crochet a net bag with Solomon's knots, you'll need the following materials: Worsted weight cotton yarn in the color of your choice Crochet hook (size H or 5mm) Scissors Tapes

How to Effortlessly Craft Multiple Strands of Yarn from Just One Ball

Image
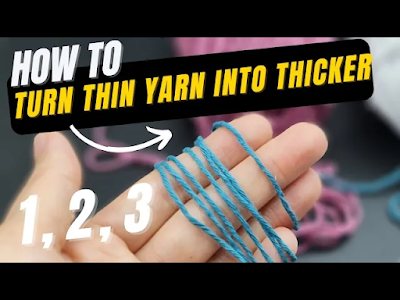
If you're an avid knitter or crocheter, you know the struggle of running out of yarn mid-project. It can be frustrating to have to stop and start again with a new ball of yarn, especially if you're working on a project with multiple colors. But what if we told you that you could easily create multiple strands of yarn from just one ball? That's right, with this DIY knitting and crocheting technique, you can effortlessly craft 3+ strands from a single ball of yarn. Why Craft Multiple Strands? Crafting multiple strands of yarn has several benefits. First, it allows you to create thicker yarn without having to buy a new ball. This is especially useful if you have a specific color or texture that you want to use but don't have enough of. Second, it can add dimension and interest to your project by combining different colors or textures. And finally, it can save you time and money by reducing the need to constantly switch between balls of yarn. How to Create Multiple Strands

How To Crochet a Charming Amigurumi Heart: Easy Step-by-Step Tutorial for Beginners

Image
Are you looking to dive into the world of amigurumi, but don't know where to start? Our easy-to-follow, step-by-step video tutorial is perfect for beginners eager to learn the art of crafting adorable amigurumi hearts. In this comprehensive guide, we'll walk you through the entire process, from selecting the right materials to mastering the essential crochet techniques. By the end of this tutorial, you'll have a charming handmade heart that's perfect for gifting or adding a touch of love to your home decor. So, grab your crochet hook and let's get started on this exciting amigurumi adventure! HERE THE VIDEO TUTORIAL:

Super Easy and Cute Crochet Baby Booties for Beginners

Image
These booties are very cute and easy to crochet even for beginners.  You can crochet for any size and age. The only thing you must crochet the sole bigger or smaller by changing the number of rows. You can also use different yarn size and hook.  I used mercerized cotton  and 2.5 mm crochet hook but you can use any yarn of similar weight.   My yarn:  Composition: 100% mercerized cotton Each skein is 50gr 125 m / 136 yards per skein Brand: Rosários 4 Written Pattern  Sole: R1: Ch 18 + ch3, insert hook into 4th chain and make 2 dc,16 dc, 6 dc into the last stitch, 16dc, sl st. R2: Ch1, ( inc of sc)*2, 7 sc,  2 hdc, 7 dc, (inc of dc) *6, 7 dc, 2 hdc, 7 sc, sc into stitch of ch1 R3: Ch3, (inc of dc) *4 , 16 dc, ( dc, inc) *6, 16 dc,  inc of dc, dc into the stitch of ch3. Optional row for bigger size R4: Ch3, ( dc, inc)*4,  16 dc, ( 2dc, inc) *6, 16 dc, dc, inc, dc into stitch of  chain 3. When the sole is done, change color and crochet 3 rows of sc.  Then

Knitting vs. Crochet: What’s the difference, and which is easier?

Image
I would like personally thank all of you for watching my videos commenting and following my tutorials.  I'm also happy to see all the projects that you sent to me that you made following my instructions or patterns, so that was really wonderful here and in 2023 I decided to add a new format to my videos, so this time I'm adding the short talking videos where I will discuss some questions or tips, and also sometimes you can ask me some questions in the comment section that are too long, and I prefer that we discuss them together.  You can comment under this video your own personal experience or point of view. Today the question is really quite difficult it's almost like to be or not to be because many of you ask what is easier knitting or crochet, which one is better, and I think there is no like really yes, no reply you must try both, and you decide which one suits you most.  I want to just share my personal experience and to say some facts, but mostly it's all opinions

How to crochet Christmas Stocking in 5 minutes

Image
Crochet Christmas stockings are really beautiful and easy to make. You will be surprised how little yarn they require and how versatile the look can be. This particular pattern is suitable for beginners as it only require  to crochet two halves and then slip stitch them together. You can easily experiment with the stitches, you may want to choose. I have chosen half double crochet ribbing method ( see detailed execution on my video) You may use absolutely any yarn and matching hook. I have used cotton for some stockings and acrylic for others. They look amazing with both yarns.    The size can be changed by simply doubling the number of stitches or by using chunkier yarn apnd bigger hook.   Notes: chain 2 does not count as a stitch. Decrease is made by skipping first stitch. Pattern: Row1) Chain 25 +2, 25hdc Crochet from row 1 to row 7: 25 hdc. Then we start to crochet the foot part. Row8) 10hdc Row 9) skip first stitch, 9 hd

Crochet Christmas Herringbone Stitch. Easy pattern for beginners.

Image
Herringbone Stitch is one of the most beautiful crochet stitches. Crocheters normally use this stitch for bags and blankets.   Crochet Christmas Tree using herringbone stitch is really easy to make and is visually attractive.  You can make ornaments and hang them on Christmas Tree or make a garland and don't forget to use them as gift tags. You can use any yarn and matching hook size.  You can customise the size of the tree by chaining more or less.  Pattern: Start by chaining 20 1 row) 20 herringbone stitches sc (20) 2 row) ch1, 20 herringbone stitches sc (20) 3 row) ch1 skip 1st stitch, 17 herringbone stitches, skip 1 stitch, 1 herringbone stitch (18) 4 row) 2 row) ch1, 20 herringbone stitches sc (18) Keep chrrocheting by decreasing two stitches on the right side and stop when you have 6 stitches.   (Watch video for further instructions) HERE THE VIDEO TUTORIAL:

Crochet Jute Bag / Shopper Bag / Tote Bag.

Image
I love to crochet Bags as the design can be absolutely customised as well as the size.  This bag I realised with a jute cord but you can use cotton cord or poliyester cord. Materials:   Jute cord 5 mm crochet cord Size:  Length - 30 cm Width- 38 cm Handles: 50 cm We are going to crochet in spiral to avoid the seam. We are going to crochet in back loops to create more ribbed texture.  We will start with the chain that can be any length  depending how big you want your bag. The base is an oval that has 2 increase on both sides of 3 stitches to make corners. Basically we need to crochet a rectangular.  After that we will crochet around without increase until the desired length.  HERE THE FULL VIDEO TUTORIAL:

How to crochet Super Easy Shoulder Bag

Image
Crochet bags are really popular and handy nowadays. You can see big and luxury brands are producing all types of crochet bags. These bags require just yarn and the hook. This pattern is super simple. You may use any yarn and hook size. All you need is to crochet a rectangular that later you fold. You may use any stitch. The initial chain depends on the size of the bag you need. If you crochet a phone case then simply take the chain and wrap the phone, leaving a bit longer for the flap. In my video tutorial, I give clear instructions and steps how to make the bag. You may use a belt from your old bag or crochet one with me. I am using magnet buttons, but you can skip this part or use zip. HERE THE FULL VIDEO TUTORIAL:

Beautiful Crochet Pattern for Beginners.

Image
This is a truly beautiful and easy crochet pattern. I really love its modern look as well as texture. It could be perfect as a blaket stitch with soft yarn. It can be good for bags and baskets. This is tge pattern of 2 rows. The patten works with multiple of 5 so you must chain 10, 15, and etc.  The next row you must chain 4 and make 3 trebles. Then wrap 3 trebles with 5 times yarn over and make chain one into next stitch and then pull the yarn theough all the loops on the hook. And finish with chain of 4. Watch video tutorial for easy instructions.  Here the full video tutorial: My links to get in contact with me: https://linktr.ee/kimcraft

Crochet Japanese Flower Hot Pad

Image
Today I am sharing a very beautiful yet very simple pattern of Japanese crochet flower that can be used as hot pad or a chair seat cushion or just as a decoration for the wall. These pattern looks really impressive.  I used cotton yarn since I decided to use them as hot pads for kitchen but you can use any yarn in case it's just for jome decoration. I recommend to use one hook size smaller than recommended on yarn label.  First time I crochet with the hook size that was recommended and it felt too loose and I couldn't assamble tge rings perfectly. I guess if you crochet tightly then maybe you can use the same hook size as recommended by yarn label. We are going to crochet 9 rings of four rows and then join them with one row of crochet. Chain 33 and slip stitch into the ring. Row 1: 33 sc Row 2: Chain 2 and make clusters of double crochet and chain one between them. ( 33 clusters of dc) Row 3: Chain 2 and make front pod