Posts

Showing posts with the label decor

Crochet Christmas Herringbone Stitch. Easy pattern for beginners.

Image
Herringbone Stitch is one of the most beautiful crochet stitches. Crocheters normally use this stitch for bags and blankets.   Crochet Christmas Tree using herringbone stitch is really easy to make and is visually attractive.  You can make ornaments and hang them on Christmas Tree or make a garland and don't forget to use them as gift tags. You can use any yarn and matching hook size.  You can customise the size of the tree by chaining more or less.  Pattern: Start by chaining 20 1 row) 20 herringbone stitches sc (20) 2 row) ch1, 20 herringbone stitches sc (20) 3 row) ch1 skip 1st stitch, 17 herringbone stitches, skip 1 stitch, 1 herringbone stitch (18) 4 row) 2 row) ch1, 20 herringbone stitches sc (18) Keep chrrocheting by decreasing two stitches on the right side and stop when you have 6 stitches.   (Watch video for further instructions) HERE THE VIDEO TUTORIAL:

Crochet Granny Square Style Christmas Tree. Super easy

Image
This is a Christmas tree pattern that looks similar to granny square stitch.  You can use absolutely any yarn and even mix color for more spectacular effect. The tree can self stand. You can crochet it as big as you wish.  You can decorate the top of Christmas Tree with a bow or a star or simply leave without any decoration as they are already beautiful by themselves. The pattern is really quick and easy. We will work with multiples of three.  It is important to remember that increases must be made under increases of the previous rows.   Abbreviation: Dc- double crochet  Ch - chain Sl st - slip stitch PATTERN  Make a magic ring Row 1): Ch3, 2 dc, ch2, 3dc, ch2, sl st Row 2): Sl st2( until space of ch2) ch3, 2 dc, ch2, 3dc, ch2, sl st Row3):    Sl st2( until space of ch2) ch3, dc, ch1, 2dc, ch2, 2dc, ch 1, 2dc ... You must make increase after 2 rows of no increase. There are only 2 increases in increase row.  Watch my video for more clear

Crochet Christmas Little House

Image
These little houses apre super easy apnd fast to make. You can use them not just as Christmas Ornaments but for any project thapt you need a crochet house.   Abbreviation: Ch - chain Dc - double crochet  St - stitch  Inc- increase Pattern: Start by making a magic ring Row1: ch3, dc*2 Row2: (ch3 and dc together)= inc, dc*3, inc Row3: Inc, dc*5, inc Row4: Inc, dc×7, Inc Row5 : Ch3, dc*10 Row6: Ch3, dc*2, skip 2 st, dc, skip 2 st, dc*3 Row7: see row 6 Row8:  Ch3, dc*10 Recommendations :  Use a hook slightly smaller than recommended on yarn label. Try to crochet tighter to avoid holes. You may use any type of yarn like acrylic or cotton.  HERE THE VIDEO TUTORIAL:

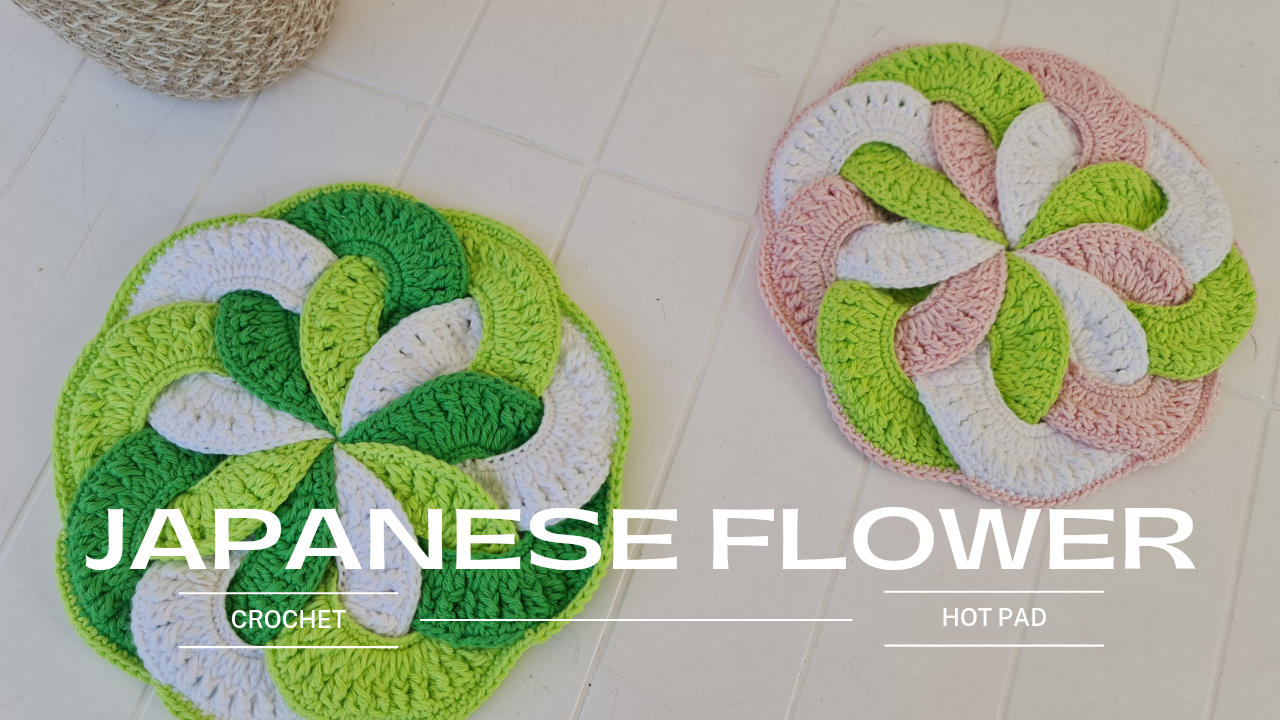
Crochet Japanese Flower Hot Pad

Image
Today I am sharing a very beautiful yet very simple pattern of Japanese crochet flower that can be used as hot pad or a chair seat cushion or just as a decoration for the wall. These pattern looks really impressive.  I used cotton yarn since I decided to use them as hot pads for kitchen but you can use any yarn in case it's just for jome decoration. I recommend to use one hook size smaller than recommended on yarn label.  First time I crochet with the hook size that was recommended and it felt too loose and I couldn't assamble tge rings perfectly. I guess if you crochet tightly then maybe you can use the same hook size as recommended by yarn label. We are going to crochet 9 rings of four rows and then join them with one row of crochet. Chain 33 and slip stitch into the ring. Row 1: 33 sc Row 2: Chain 2 and make clusters of double crochet and chain one between them. ( 33 clusters of dc) Row 3: Chain 2 and make front pod

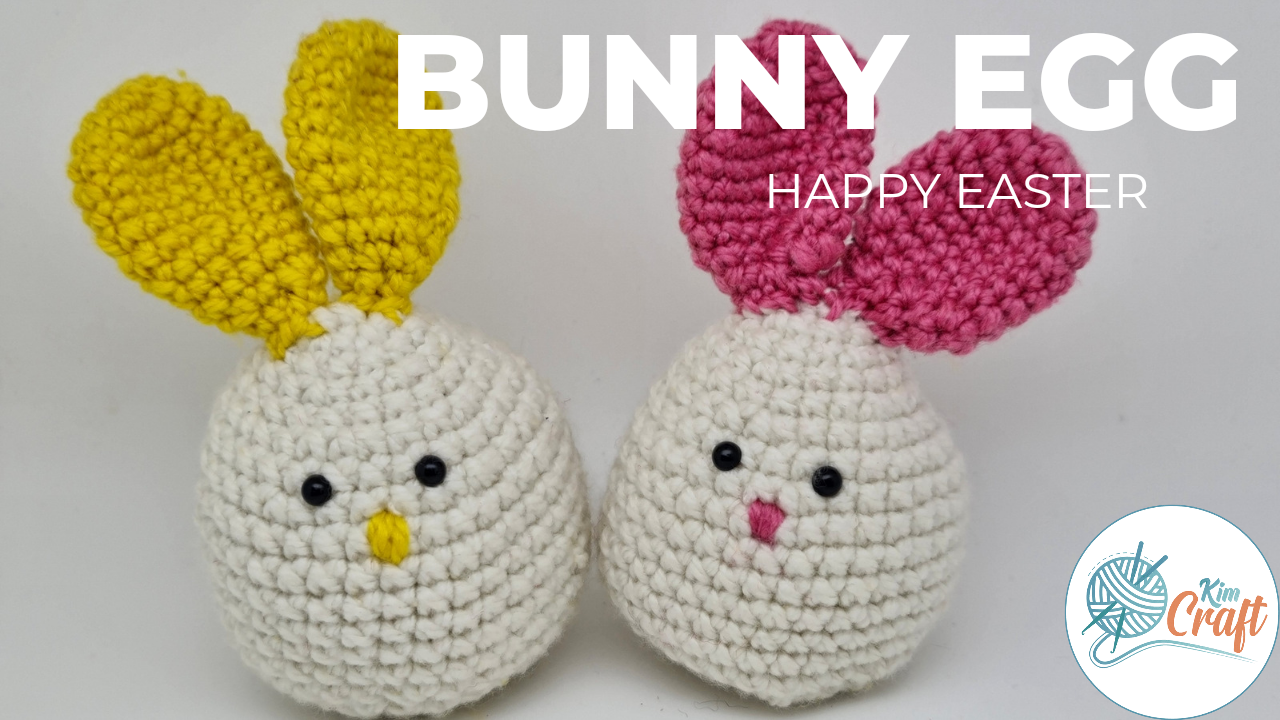
How to crochet Easter Bunny Egg

Image
For this Bunny Egg I used acrylic yarn but you can use any yarn and hook size smaller than recommended on yarn label. I used X single crochet stitch to make better shape, you can still use normal single crochet.  You can add more details such as tail and paws to make it look like a Bunny. Abbreviation  sc - single crochet inc - increase dec - decrease  Body Magic Ring ROW 1: 7sc ROW2: 7inc (14sc) ROW3: 14 sc ROW4: 1sc, inc (21sc) ROW5: 21sc ROW6: 2sc, inc (28sc) ROW7: 28sc ROW8: 3sc, inc ( 35sc) ROW9 -ROW14  35sc ROW15: 5sc, dec ROW16: 4sc, dec ROW 17 3sc, dec ROW18: 10dec ROW19: 4dec EARS ROW1: 6sc ROW2: 12sc ROW3: 18 sc ROW4- ROW7: 18 sc ROW8: 4sc, dec ROW9: 3sc, dec ROW2: 2sc, dec HERE THE VIDEO TUTORIAL:

Crochet Bunny from a Square in 30 minutes

Image
This is a super easy pattern for crochet Bunnies. I personally spend 20 to 30 minutes to make one bunny. First, you can crochet any kind of size of square or even with any kind of crochet stitch, but I prefer single crochet.  If you prefer, you can even knit a square.   Watch my video tutorial to see exact instructions how to transform a square into a bunny.  For the tail, I decided to make a pom-pom but you can also crochet a small ball or use pom-pom from craft shops.  The paws are effortless and can be optional or make a few stitches with tapestry needle. Watch my way of making paws in the video.  You can use any type of eyes or even make embroidery eyes.  I also think that with ribbon, the bunnies look cuter. HERE THE VIDEO TUTORIAL:

Crochet Amigurumi Whale in 20 minutes

Image
I used 3,5 mm crochet hook and polyester yarn. You may use any yarn  Pattern  by @trunosha (Instagram).  CH - chain  Sc - single crochet  Inc - increase  Dec- reduction  Sl st- slip stitch  Hdc - half double crochet Starting with blue yarn 1. 6 sc in the amigurumi ring (6) 2. 6 inc (12) 3. (1 sc, 1 inc) * 6 (18) 4. (2 sc, 1 inc) * 6 (24) 5. 21 sc, 1 hdc, 2 hdc in one loop, 1 hdc (25) 6. 3 sc Fin - 4 ch, in the third loop from the hook sl st, 2 ch, at the base of the fin sl st. 14 sc Fin - 5 ch, in the third loop from the hook sl st, 1 ch, at the base of the fin sl st. 3 sc, 1 jdc, 2 hdc in one loop. Tail - 5 ch, in the third loop from the hook sl-st, 3 ch, in the base of the tail sl-st, 6 ch, in the third loop from the hook sl-st, 2 ch, sl-st in the base of the tail. 2 hdc, 1 hdc (26) 7. 3 hdc, skip the fin, 14 hdc, skip the fin, 2 hdc, 2 hdc, 2 hdc cluster, skip tail, 2 hdc in a cluster, 1 hdc (24). Change the yarn to white. 8. 21 sc, 3 hdc (24) 9. (2 sc, dec)

How to Crochet Christmas Tree. Lebab stick Christmas Tree

Image
This is a super easy to crochet Christmas Tree because we will use kebab stick or bamboo stick instead of trunk. You can use any stick or brunch. We are going to crochet several layers of Christmas Tree with brunches. You can make as many layers as you need with absolutely different number of brunches. Use a bit of glue to put the layers on the stick. Start with 4 sc into Magic Ring Row1: 4sc (4) Row2: 4sc (4) Row3: 4 inc (8) Row4: (4 sc, inc)*2 (10) Brunches Ch3, 2dc,( ch5, sl st)*3 In each layer to add more number of brunces just make 4 increases in random order HERE THE VIDEO TUTORIAL:

Crochet Christmas Garland in 1 hour. Jasmin Stitch

Image
This beautiful Christmas Tree Garland will make your interior super festive. These trees are very elegant yet super easy and fast to make. Jasmin stitch is a puff stitch that will make your tree stand out. You can crochet a bigger size trees by increasing the number of chains. You may use any type of yarn and a  matching hook size. I am using 100% cotton yarn and 3.5 mm crochet hook.   Here the full video tutorial:

Free Crochet Holly Leaf Step by Step Tutorial for 

Image
Hi everyone!! I am still crocheting for Christmas.  I love all Christmas Ornaments, and today I am going to share one of the most beautiful ornaments that is beautiful, simple and superfast to make. We are going to crochet step by step, and I am sure you will be happy to decorate gifts and objects with this beautiful ornament.