Posts

How to Crochet Modern Granny Square

Image
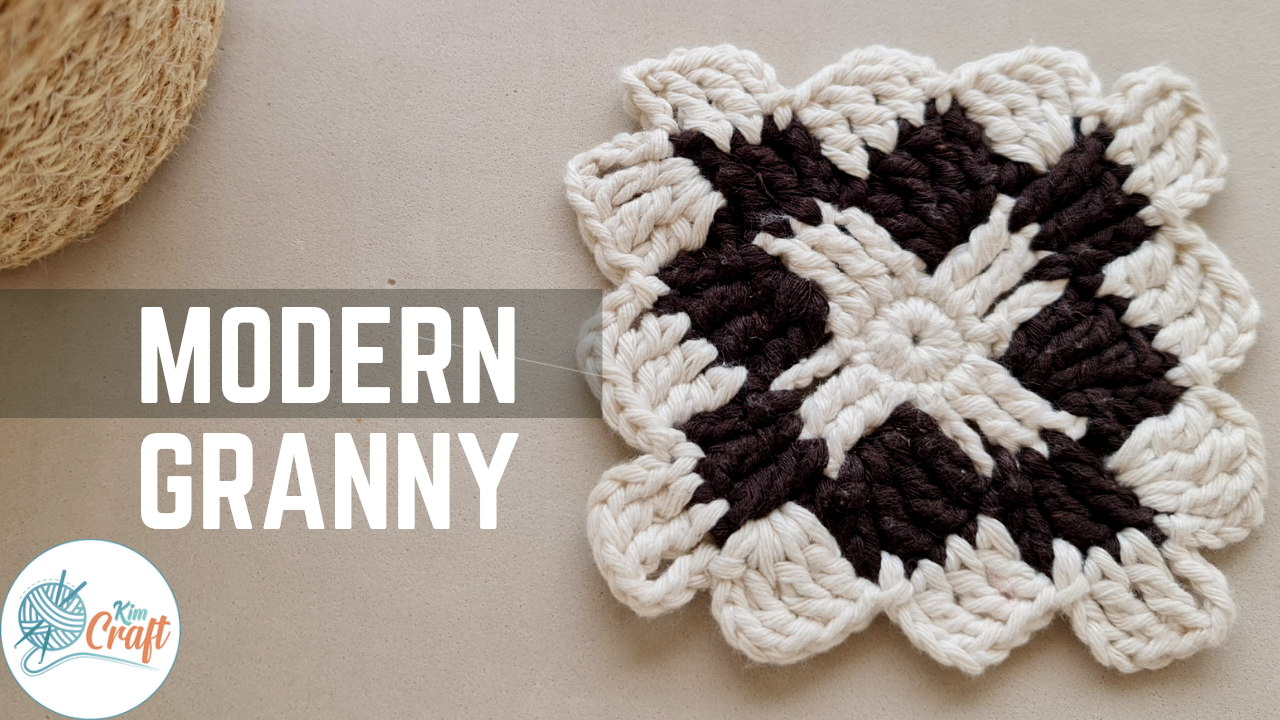
Hello everyone!! This granny square is a very simple pattern which can be crochet of any size. You can crochet blankets, cardigans, bags or whatever you like. Pattern: Start with a magic ring Row1: 12 single crochet into a Magic ring Row2: (Chain4, 2trebles, chain4, sl st )*3 Change color ( optional) Row3:( Chain 4 2 trebles, chain4, sl st, chain4, 3 trebles, sl st,)*3 Row4 (Row3:( Chain 4 2 trebles, chain4, sl st, chain4, 3 trebles, sl st, chain4, 3 trebles, sl st)*3 The detailed instructions are available in my video. Please comment if you like the pattern.🤩 Here the video tutorial:

Crochet Japanese Flower Hot Pad

Image
Today I am sharing a very beautiful yet very simple pattern of Japanese crochet flower that can be used as hot pad or a chair seat cushion or just as a decoration for the wall. These pattern looks really impressive.  I used cotton yarn since I decided to use them as hot pads for kitchen but you can use any yarn in case it's just for jome decoration. I recommend to use one hook size smaller than recommended on yarn label.  First time I crochet with the hook size that was recommended and it felt too loose and I couldn't assamble tge rings perfectly. I guess if you crochet tightly then maybe you can use the same hook size as recommended by yarn label. We are going to crochet 9 rings of four rows and then join them with one row of crochet. Chain 33 and slip stitch into the ring. Row 1: 33 sc Row 2: Chain 2 and make clusters of double crochet and chain one between them. ( 33 clusters of dc) Row 3: Chain 2 and make front pod

How to make Double Magic Ring

Image
I have used magic circles for hundreds of projects. They are easy to make and more adjustable for working into a ring. You can make the hole really closed while chaining can leave the hole and spoil esthetic look of your project. I have many tutorials of how to make a traditional simple magic ring. It is perfect for many projects and I used it a lot instead of chaining.  One Ring Magic Ring STEP 1 STEP2 STEP3 STEP 4 STEP 5 STEP 6 STEP 7 STEP 8 Double Magic Ring STEP 1 STEP 2 STEP 3 STEP 4 STEP 5 STEP 6 STEP 7 STEP 7 Now we can crochet into the ring like we are used to. You can make single crochet or any stitch How to close double magic ring First pull the tail and see which ring starts to close then pull that exact ring first

How to crochet Easter Bunny Egg

Image
For this Bunny Egg I used acrylic yarn but you can use any yarn and hook size smaller than recommended on yarn label. I used X single crochet stitch to make better shape, you can still use normal single crochet.  You can add more details such as tail and paws to make it look like a Bunny. Abbreviation  sc - single crochet inc - increase dec - decrease  Body Magic Ring ROW 1: 7sc ROW2: 7inc (14sc) ROW3: 14 sc ROW4: 1sc, inc (21sc) ROW5: 21sc ROW6: 2sc, inc (28sc) ROW7: 28sc ROW8: 3sc, inc ( 35sc) ROW9 -ROW14  35sc ROW15: 5sc, dec ROW16: 4sc, dec ROW 17 3sc, dec ROW18: 10dec ROW19: 4dec EARS ROW1: 6sc ROW2: 12sc ROW3: 18 sc ROW4- ROW7: 18 sc ROW8: 4sc, dec ROW9: 3sc, dec ROW2: 2sc, dec HERE THE VIDEO TUTORIAL:

Crochet Bunny from a Square in 30 minutes

Image
This is a super easy pattern for crochet Bunnies. I personally spend 20 to 30 minutes to make one bunny. First, you can crochet any kind of size of square or even with any kind of crochet stitch, but I prefer single crochet.  If you prefer, you can even knit a square.   Watch my video tutorial to see exact instructions how to transform a square into a bunny.  For the tail, I decided to make a pom-pom but you can also crochet a small ball or use pom-pom from craft shops.  The paws are effortless and can be optional or make a few stitches with tapestry needle. Watch my way of making paws in the video.  You can use any type of eyes or even make embroidery eyes.  I also think that with ribbon, the bunnies look cuter. HERE THE VIDEO TUTORIAL:

Crochet Headband Knit like Stitch

Image
Crochet headbands are quick and easy to make.  They require little yarn and keep your head warm. Yarn used in the tutorial: https://rosarios4.com/en/montra/fio-tricot-mimo/ Hook: 8 mm The crochet headband foundachain length equals head circumstance of the person, you crochet for. The width depends on your personal choice, mine is 7 cm. For this pattern, I decided to make an increase after each row and crochet the next row by skipping an increase.    Watch the  video tutorial to see the exact instructions to keep the edges smooth and even. Chain 50 ROW 1) 51 sc ROW 2) Chain 1, 51 sc into side stitch under the chain, inc  Repeat row 2 until desired width. HERE THE VIDEO TUTORIAL:

Crochet Amigurumi Whale in 20 minutes

Image
I used 3,5 mm crochet hook and polyester yarn. You may use any yarn  Pattern  by @trunosha (Instagram).  CH - chain  Sc - single crochet  Inc - increase  Dec- reduction  Sl st- slip stitch  Hdc - half double crochet Starting with blue yarn 1. 6 sc in the amigurumi ring (6) 2. 6 inc (12) 3. (1 sc, 1 inc) * 6 (18) 4. (2 sc, 1 inc) * 6 (24) 5. 21 sc, 1 hdc, 2 hdc in one loop, 1 hdc (25) 6. 3 sc Fin - 4 ch, in the third loop from the hook sl st, 2 ch, at the base of the fin sl st. 14 sc Fin - 5 ch, in the third loop from the hook sl st, 1 ch, at the base of the fin sl st. 3 sc, 1 jdc, 2 hdc in one loop. Tail - 5 ch, in the third loop from the hook sl-st, 3 ch, in the base of the tail sl-st, 6 ch, in the third loop from the hook sl-st, 2 ch, sl-st in the base of the tail. 2 hdc, 1 hdc (26) 7. 3 hdc, skip the fin, 14 hdc, skip the fin, 2 hdc, 2 hdc, 2 hdc cluster, skip tail, 2 hdc in a cluster, 1 hdc (24). Change the yarn to white. 8. 21 sc, 3 hdc (24) 9. (2 sc, dec)